 This blog post covers putting your live Twitter feed in Blackboard. Basically you can place your feed anywhere you can edit text in the Blackboard Learn System. That means it can go in a discussion, a blog post, a wiki page, a content item, test instructions or anywhere the text editor exists in Blackboard Learn.
Embedding your Twitter feed or a Twitter conversation will drive student engagement by putting information you want students to be familiar with, where they spend the most time. Students can actively extend class discussions, research topical information and affirm each others posts with Twitter and embedding the feed or #hashtag search can prompt them to do so.
Here are the steps:
Visit Twitter.com and click the Settings wheel at the upper right-hand side of the screen, then click the word Settings.
 |
Once on the Twitter Settings page, click the Widgets area on the left-hand side, then click the Create New button.
 |
Under the User Timeline tab be sure your Twitter handle shows up in the Username field. Select your display options and then click the Create Widget button.
 |
Copy the widget code from the box at the bottom of the Edit Widget page.
 |
Next you can Paste the code in HTML view of any Blackboard Text editor. Start by clicking the HTML button of your content editor in Blackboard (remember this can be within any discussion, blog post, item, folder etc..).
 |
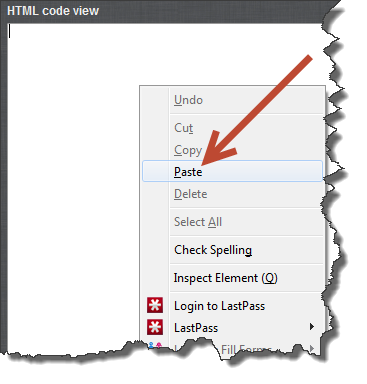
Right-click and paste or, CTRL/CMND V and paste the widget code.
 |
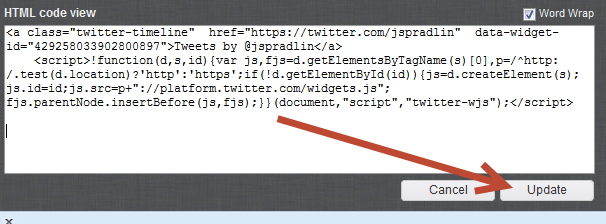
Click the Update button on the HTML view window and then click Submit.
 |
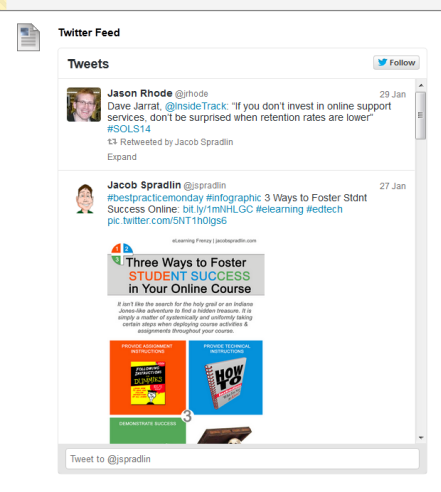
Your Twitter Feed will now display in Blackboard where you put it:
 |
When you create your widget you can also embed a conversation that your class is having our that is happening in the Twitter-sphere. Simply use the Search tab when creating the widget and search for the #hashtag that you are using in your twitter conversations.
 |


Leave a comment