 So, you’ve been at this Blackboard thing for a couple of semesters and you are starting to feel comfortable with the learning management system. You’ve mastered the art of uploading and attaching files to content. The discussion board is your boon companion and you are collecting assignments digitally from your students via the assignment tool. Navigating the grade center is like riding a bike and you feel good about it!
What now? Learn a new tool or technology? Live inside your course for the next 6 months? Well, you could do those things, but let me suggest a slightly different approach. Have you considered adding an important layer to your Blackboard course by inserting images?
Importance of Images
- Convey course information in an alternate method.
- Students pay more attention to articles/readings with graphic content.
- Breaks up monotony of “text-only” Blackboard pages.
- Increases student engagement by making them use a different part of their brain.
- It just looks better!
Below are examples of a Blackboard content area without graphics and a content area with graphics. Which one looks better? Which one would you rather read?
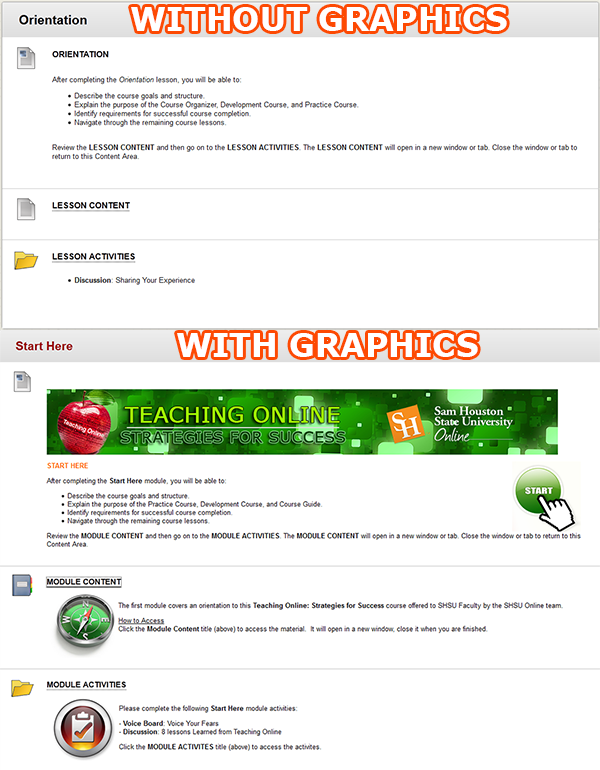
In this example the graphics are more of the decorating variety, but they do add color and continuity to your course. Imagine having your course banner at the top of every major content area in your course. In this case there are examples of images in a content item, learning module and content folder descriptions. Almost anywhere you use the content editor in Blackboard, you can place an image.
Inserting an Image
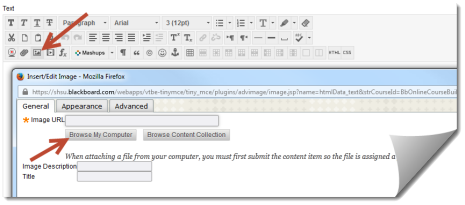
- Click the Insert/Edit Image button on your content editor.
- Browse to where your image is saved and attach it.
- Type an Image Description (for screen readers).
- Click the Insert button.

Editing an Image (Alignment, Spacing and Size)
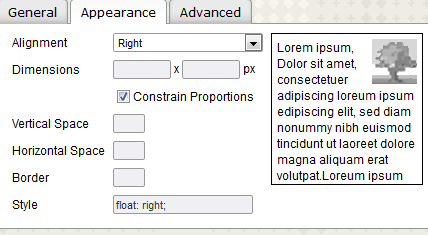
- Click on the image you have placed in the Content Editor.
- Click the Insert/Edit Image button.
- Click the Appearance tab.
- Adjust your Alignment, Spacing and Size.

With a few clicks of your mouse, your Blackboard course can go from black and white text to a colorful tapestry of text and images that convey meaning to students in a number of different ways!
Resources – Free Images For Your Courses


Leave a comment