
There are many good reasons to keep your course from growing too big for its own britches. A large course could impact your student’s learning experience because:
- The size of course intimidates your students.
- The same document in multiple places takes up space and clutters the course.
- Large images take forever to load and..
- Take up valuable visual real estate on handheld devices.
- The more items in your course and LMS, the slower it operates.
Keeping these things in mind there are steps you can take to manage your online courses so they don’t become overwhelming, unnavigable, burdensome and out of control.
Step 1: Keep your course organized.
One of the easiest ways to think about your online course’s health and well being is to keep it organized. Traditionally when we think about our courses being held in an LMS, we think of our course as having large containers that hold different types of content like assignments, tests and course materials.

This can be an easy way to think about organizing at the beginning, but the end result is that over time, these buckets become catchalls or laundry lists of everything you’ve ever added to your course. This causes your students to suffer from over scrolling and to constantly search for important information and activities. Another side effect of this particular organizational method is that it causes the instructor to have trouble determining whether or not they put “that file” in the course.
Instead of large “buckets of information”, why not think of chunking them across topics, or by time. That way, all of the information and activities that a student will need to interact with during a specific week or around a particular topic is located in the same space.
 By organizing your content, you make it easier for you and your students to find what you are looking for and reduce the ‘laundry list’ effect.
Step 2: Use Course Links to cut down on content cloning.
 The next step in our online course weight loss plan covers the use of one particular document in different places throughout your course. Whether it is a special rubric, a project guideline or just something you want available easily for your students, it is natural to just want to add the document where you need it. Over time, you create multiple versions of the same document that just adds extra weight to your course and makes your list of course files hard to deal with from a file management perspective.
Most learning management systems provide a way for you the instructor to “link” to the document in question wherever they are in the course. Here at Sam Houston State University, we use Blackboard and it provides this ability via the Course Links content item. Course Links allows instructors to link to files, content items and course activities anywhere in their course.
This way, an instructor only has to add 1 instance of whatever it is they want to use throughout the course and link to it from other course areas.
Step 3: Reduce the size of images BEFORE placing them in your course.
By now, we are all familiar with the fact that adding contextually relevant images to your course is a best practice. Course images engage your students, stimulate different parts of the brain and break up what would otherwise be an ocean of Times New Roman or Arial text.
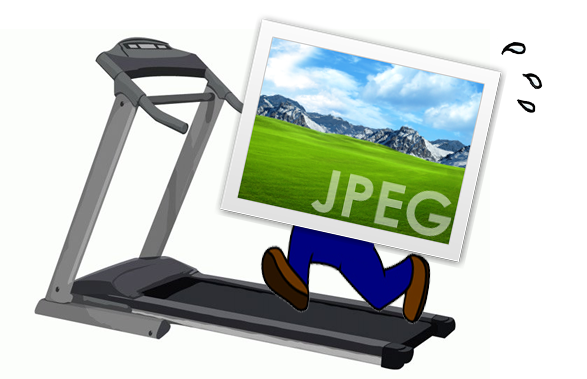
The issue for instructors is that the learning management system does not provide a way to reduce the size and weight of the image prior to placing it in a course. It does not allow you to change the “visual appearance” of an image by resizing how the image looks, but this DOES NOT reduce how much space the image takes up in your course or how long it takes a student on their computer or mobile device to see the image.
The good news is that almost every computer comes with a software that will help you change the size and weight of images before you place them in the course. In most cases, once you are in the software reducing the size of the images automatically reduces how much drive space they takes up. Below we will provide a few links to helpful how-tos on the Internet, but you can always google the topic and find what works for you.
- Reducing Image Size in Microsoft Paint
- Reducing Image Size in Photoshop
- Reducing Image Size in Microsoft Word
- Reducing Image Size on a Mac
Step 4: Use streaming services and Internet links for videos rather than uploading them directly to your course.
 One of the most effective ways to engage your students online is to employ videos along with learning activities throughout your course. Videos add another dimension to your course that connects with your students and can be viewed on whatever device they may be utilizing.
The best practice for how to leverage videos in your online course is to host them with a streaming service or link to videos already hosted elsewhere. Burdening your LMS with Gigs of video files will have a direct impact on your students, because the way they are hosted/loaded is not ideal for streaming on mobile devices or even computers. Also the more large files you add to your learning management system the more you can affect its performance.
Fortunately, there is a great way for you to utilize video in your online courses while following the best practice. Just use other video hosts and provide links and embeds in your online course. Here at SHSU, Blackboard has the ability to directly embed YouTube videos in your course while leaving them hosted in YouTube. It does this via the YouTube mash-up and the Video Everywhere tool. We also utilize Kaltura for video/lecture capture and screen recording. Blackboard employs a Kaltura mash-up and content building tool to place these videos/screen recordings directly in your course content.
Teaching an online course can be intimidating in its own right. Make it easy on yourself. Keep your course in “eLearning shape” by ensuring your course is properly organized, providing links to course documents you want to use in multiple places, reducing the size of graphics and pictures before you insert them in course content, and using streaming services and internet links rather than uploading heavy video files directly to your course. These aren’t the only steps you can take, but they are a great place to start.


September 15, 2015 at 9:56 am
Reblogged this on and commented:
Thanks for sharing these great points
September 22, 2015 at 9:27 am
These are some good tips, Jacobs. I have seen some courses with videos included, and the poor authors wondered why a pendrive can barely hold it. Hope your post prevents at least some situations like this ; )